
Are you excited about transforming your living room into a cinematic oasis even when the sun shines? The common question is whether you can use a projector during the day. Without a doubt, the answer is yes! You can enjoy your favorite movies, games, or presentations before nightfall if you use the proper techniques and have the necessary tools.
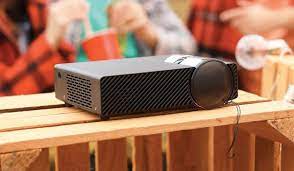
No matter the screen size, getting a projector with at least 4,000 lumens is best if you intend to use it outside during the day. Although 4000 lumens should be adequate in somewhat sunny settings, more incredible lumens often correlate to better performance.
This guide will walk you through every step of setting up and using a projector during the day so that you have an outstanding experience. However, it’s crucial to remember that obtaining a fulfilling projection experience during the day requires a few deliberate actions.
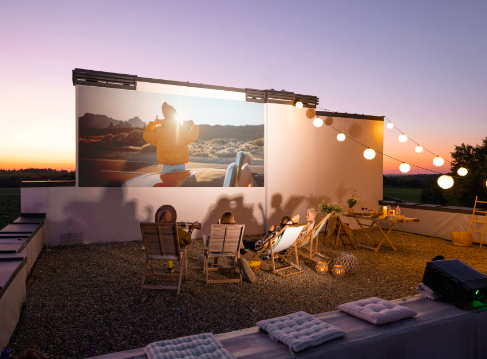
How to Create a Daylight Movie Theater?
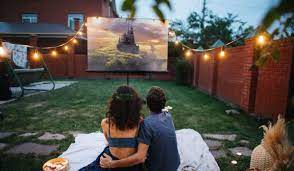
Creating an outdoor movie theater can be a fun and exciting project. Here’s a simple step-by-step guide to help you set it up:
Step 1: Choose the Right Location
Pick a suitable area in your yard or outdoor space for your movie theater. It should have enough space for seating and a movie screen. Ensure the ground is level so chairs and the screen can be set up quickly.
Step 2: Gather Equipment and Materials
You’ll need:
- A projector: Choose one with sufficient brightness for outdoor use.
- A screen: You can buy a portable outdoor screen or use a white bed sheet.
- Speakers: Consider using Bluetooth speakers or a portable sound system.
- Media source: This could be a laptop, DVD player, or streaming device.
- Extension cords and power strips: Ensure you have enough power outlets.
Step 3: Set Up Seating
Arrange comfortable seating for your audience. You can use blankets, cushions, or outdoor chairs. Make sure everyone has a clear view of the screen.
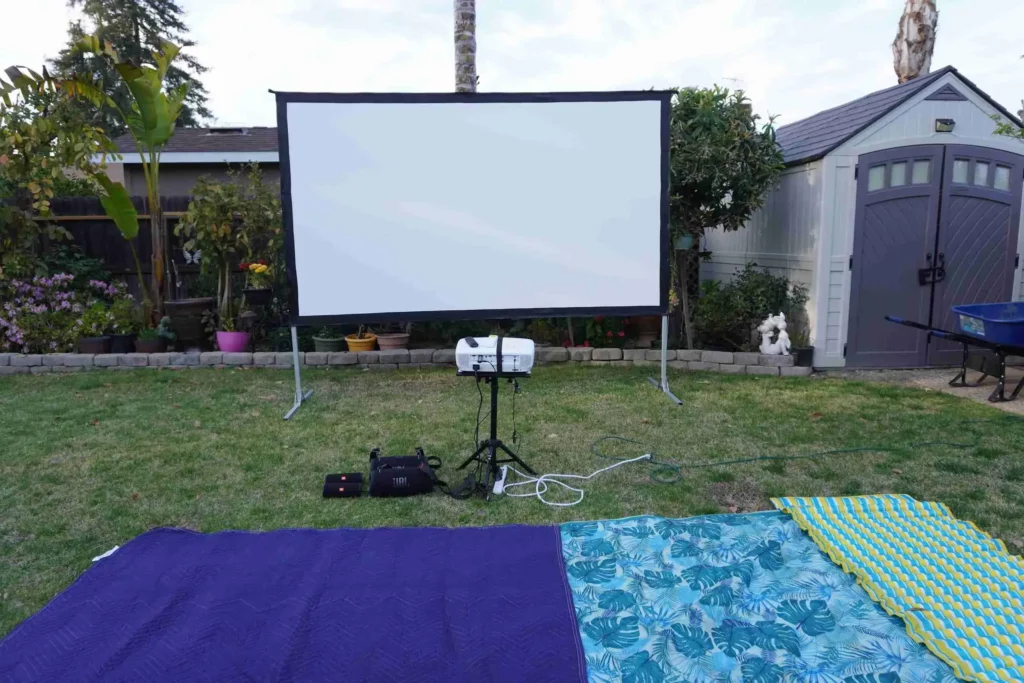
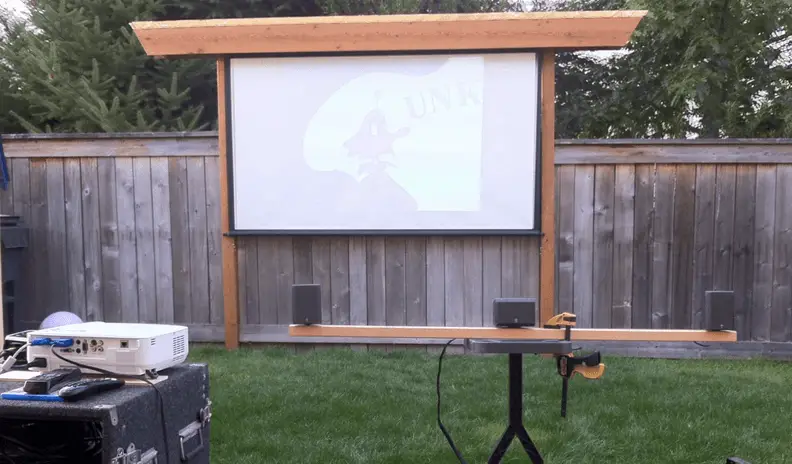
Step 4: Install the Screen
If you’re using a portable screen, follow the manufacturer’s instructions to set it up securely. If using a bedsheet, hang it between two trees or a wall. Make sure the surface is smooth to provide a clear projection.
Step 5: Set Up the Projector
Place the projector on a stable surface facing the screen. Connect it to your media source using the appropriate cables. Ensure the projector is right from the screen to get a clear and well-sized picture.
Step 6: Arrange the Speakers
Position your speakers on either side of the screen for good audio coverage. Connect the speakers to your media source using wired or wireless connections. Test the sound to ensure it’s clear and balanced.
Step 7: Test the Setup
Before the movie night:
- Do a test run.
- Play a short video to check if the projection and audio are working as expected.
- Make any necessary adjustments to the projector, screen, and sound.
Step 8: Choose the Movie
Select a movie suitable for your audience and fits the outdoor setting. Make sure you have the film ready to play on your media source. It’s time to start the movie once everything is set up and tested!
Check out this Forum link featuring a discussion about a daylight projector, exploring its visibility and performance under bright outdoor conditions. The comments offer insights into its practical uses and potential limitations.
Top Tips for Using a Projector Outdoors
Even though using a projector in broad daylight may seem intimidating, you can still enjoy sharp, clear images with the appropriate approach. Here is a quick tip to help you get the most out of using your projector during the day.
Step 1: Check the Lumens – How Bright Should It Be?
Before you start, it’s crucial to understand the importance of lumens – the measure of brightness for projectors. For outdoor use, you’ll want a projector with higher lumens. Generally, a minimum of 4000 lumens is recommended to combat the ambient light and maintain clear visuals outdoors.
Step 2: Find a Shaded Area
Choose a place that will protect the projector screen from direct sunlight. This can be anywhere that prevents direct sunlight from shining on the screen, such as under a tree or a canopy. As a result, glare is reduced, and the projected image is easier to see.
Step 3: Adjust Projector Settings
Navigate the settings menu for the projector. Increase the contrast and brightness settings to improve image visibility in well-lit environments. The majority of projectors provide settings to enhance the quality of the image.
Step 4: Position the Screen Correctly
Make sure the projector screen is not facing the sun directly. This shields the screen from direct sunshine, making it simpler to see the projected information.
Step 5: Use a High-Quality Screen
Purchase a good projector screen. A suitable screen guarantees uniform light reflection and improves picture quality. You can use a white wall without a screen, although a dedicated screen is advised.
Step 6: Test the Projector Placement
Before your main event, it’s smart to do a trial run of your setup. This way, you can spot any potential technical hitches or adjustments that might be needed. It ensures that when the actual showtime arrives, everything runs seamlessly.
Step 7: Use External Speakers
To improve audio quality, connect external speakers to the projector. By doing this, the audio is made to be as clear as the images, providing an immersive experience.
Step8: Consider Power Sources
Outdoor setups require longer power cords or portable power sources. Ensure you have a reliable power solution to keep your projector and other equipment running throughout the event.
Step 9: Time It Right

Select a late afternoon or early evening time for your outdoor presentation. The projected image is easier to see when the sun’s brightness is at its lowest.
Step 10: Enjoy Your Projection
You’re ready to enjoy your daylight projector experience once everything has been set up and adjusted. Relax, take a seat, and dive into the content of your choice.
Step 11: Monitor for Changes in Light
Monitor the projected image as the sun moves and light conditions change. You should make minor adjustments to the projector settings to sustain optimal visibility.
Step 12: Consider Backup Options
Even with the most thorough planning, unforeseen issues can crop up. Having a backup plan ready to go in case of technical glitches or weather-related concerns is a smart strategy. This way, your outdoor projection event can continue smoothly despite unexpected obstacles.
Step 13: Pack Up Carefully
After you’re done with the projector, could you turn it off and unplug it? If the projector isn’t built to withstand weather conditions, it’s advisable to store it indoors to protect it from the elements.
Step 14: Clean and Maintain
After each use, clean the projector lens and screen to eliminate any dust or dirt. Proper upkeep contributes to enhanced performance for your subsequent outdoor projection endeavors.
Step 15: Keep an Eye on the Weather Forecast
Mother Nature can be unpredictable, so always check the weather forecast before setting up your outdoor movie night. You would want to avoid your plans being washed out by unexpected rain.
Step 16: Reflective Display – Ensure Your Projector Can Handle It
Using a projector with a robust reflective display is essential. Some projectors are better equipped to handle outdoor conditions, providing sharper images and vibrant colors that can compete with the surrounding environment.
I’ve shared this AVS Forum link for your convenience, as it offers insightful discussions about daylight projectors and how they perform in bright outdoor settings. Explore the link to gain valuable insights before setting up your outdoor movie theater.
FAQs
Q1: Can any projector be used during the day?
A: The majority of projectors may be utilized during the daytime. However, projectors with higher brightness levels are better suited for daylight because they offer better vision in well-lit situations.
Q2: Do blackout curtains make a significant difference?
A: There is no doubt that blackout curtains can change a room significantly. They significantly contribute to improving image quality by reducing external light-related disruptions.
Q3: Can I use a white wall as a projection surface?
A: Using a smooth white wall as a projection surface is a possibility. A dedicated projector screen, however, frequently produces better image quality and clarity outcomes.
Q4: How do I prevent overheating?
A: Ensure your projector has enough room for airflow to prevent overheating. Position the projector on a flat, firm surface to ensure proper airflow.
Q5: Can I watch 3D content during the day?
A: You may unquestionably watch 3D media during the day. However, it’s advised to utilize a projector with higher brightness levels for an ideal 3D experience in well-lit spaces.
Conclusion
To summarize, utilizing a projector during the day is doable with the proper settings and setup. Regardless of the screen size, if you plan to use the projector outside during the day, strive for a projector that offers at least 4,000 lumens. In general, the more lumens, the better, although a minimum of 4000 lumens should be sufficient during partially sunny hours. You can engage in your favorite content without being constrained by the sun’s position in the sky by carefully following the specified steps and considering essential elements.
REFERENCES
- https://en.wikipedia.org/wiki/Movie_projector
- https://forums.digitalspy.com/discussion/2426521/projectors-for-daytime-use
- http://www.bigscreenforums.com/forum_topic.cfm?which=21182
- https://www.avsforum.com/threads/outdoor-daytime-projector-and-screen.3228495/
- https://discourse.vvvv.org/t/daylight-projector/13912

Fernando Shrader
Hey, It’s me, Fernando Shrader. I’m the creator of this website. You might wonder why I’ve created this blog and what’s the difference between Visual Finds and other online blogs. As a professional technician working for the last 8 years with projectors, I though this is the right time to share what I’ve learned in this journey with an online audience so they can see what I’m doing and how they can solve their problems! Happy Learning!