
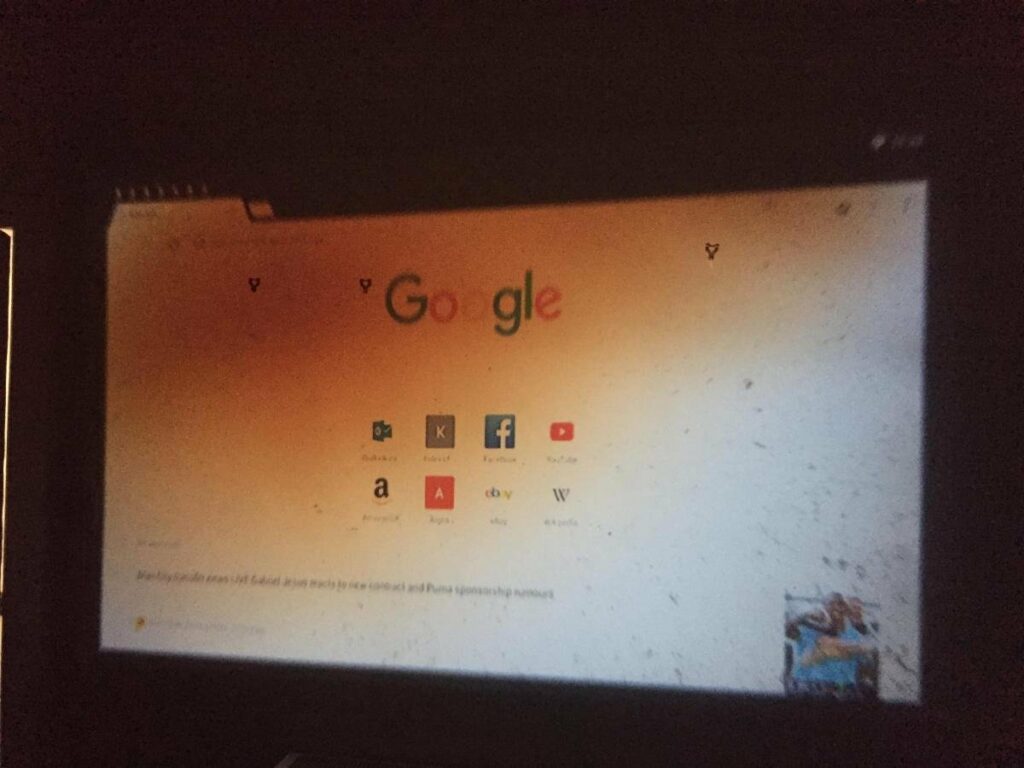
Projectors have the incredible power to transform any space into a canvas for captivating visuals. Yet, the appearance of a burn spot on your projector’s display can throw a glitch in this immersive experience. A burn spot is like a stubborn stain on a masterpiece, disrupting the clarity and brilliance of your projections. But fear not!
Switch off your projector and give it time to cool completely. Then, remove the projector’s screw to reveal the panel. Use a dry, clean, lens-friendly microfiber cloth or wipe to start cleaning the stains, such as the MagicFiber Microfiber Cleaning Cloths or the Koala Lens Cleaning Cloth.
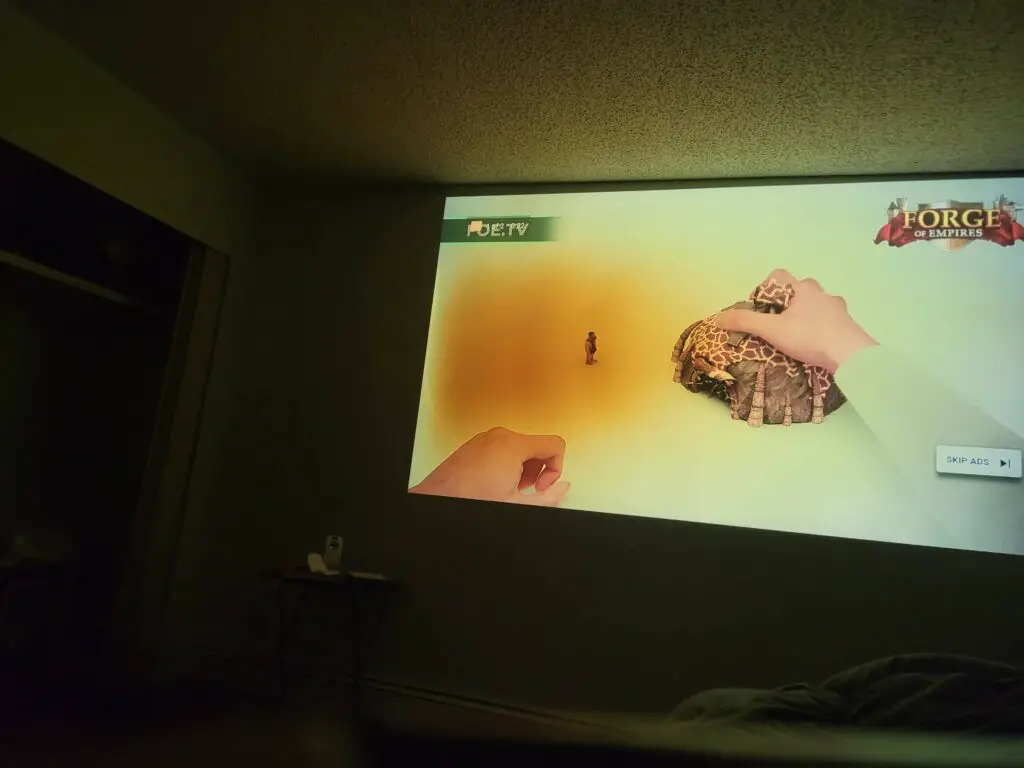
In this guide, we’re here to shed light on the issue and provide effective solutions to eliminate burn spots, allowing you to once again revel in a seamless and vibrant viewing journey.
Step 1: Checking the Basics
Before embarking on complex solutions, it’s essential to rule out the basics. Examine your projector’s cables, sources, and connections. A loose or faulty connection can often lead to issues like burn spots. Make sure everything is securely connected before moving on.
Step 2: Cleaning the Lens
A dusty lens can significantly impact your projection quality. Take a microfiber cloth and gently clean the lens surface to address this. Start by removing dust particles, fingerprints, and any smudges that could be causing the burn spot. This simple cleaning step might clear up the issue entirely.
Step 3: Adjusting the Focus
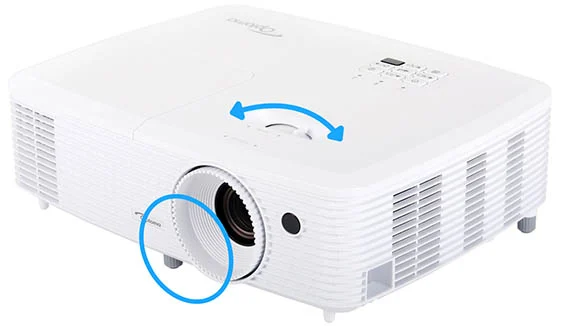
The focus ring on your projector is pivotal for a sharp image. Experiment with it by making small adjustments. Even a slight twist can lead to better focus and image clarity. Imagine it as fine-tuning the focus, similar to adjusting a camera lens. This adjustment might be all your projector needs to produce clear visuals.
Step 4: Inspecting the Bulb
An aging projector bulb can result in various problems, including burn spots. If your bulb is nearing its end of life, it’s advisable to replace it. Newer bulbs ensure better light distribution and can eliminate burn spots caused by an old, deteriorating bulb.
Step 5: Updating the Firmware
In the digital age, software updates can work wonders. A firmware update can address underlying issues that might be causing the burn spot. Visit the manufacturer’s website to find the latest firmware version for your projector model. Follow their instructions to perform the update, which can be akin to giving your projector a performance boost.
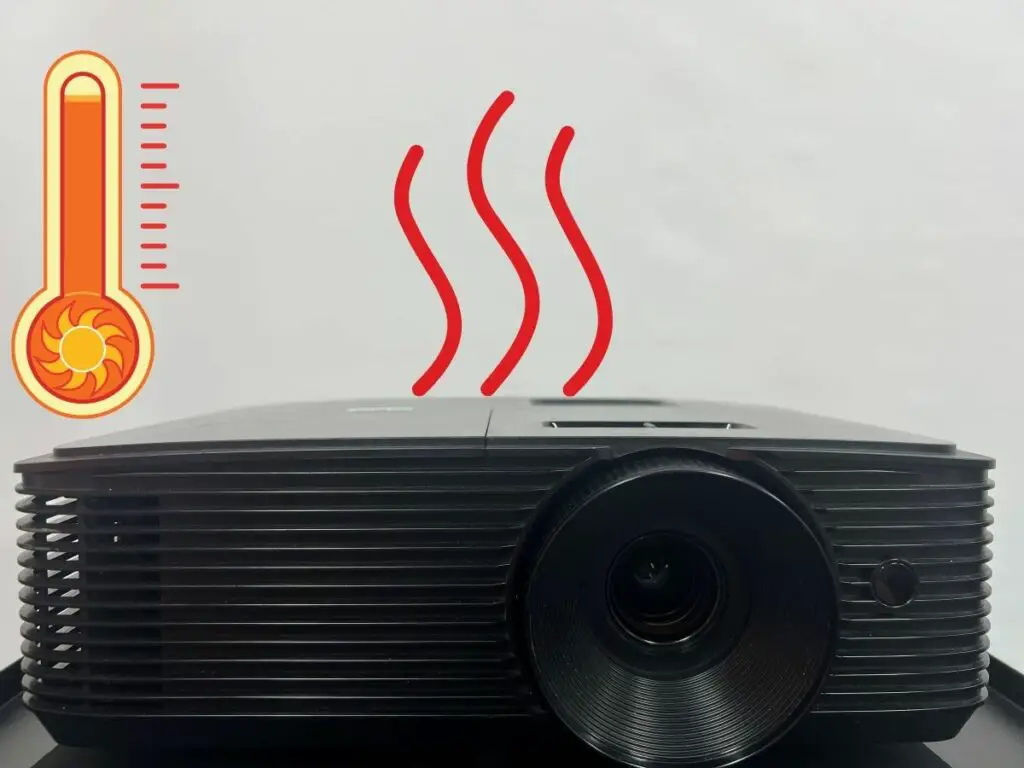
Step 6: Cooling and Ventilation
Heat can be a projector’s enemy, leading to problems such as burn spots. Ensure your projector has proper ventilation and is placed in a well-ventilated area. Dust and debris accumulation can hinder ventilation, so keep the projector’s surroundings clean.
Learn the tricks to repair burn spots on projectors in this step-by-step Youtube video guide. Say goodbye to image imperfections with easy-to-follow solutions!
Step 7: Examining Internal Components
If you’re comfortable with technical troubleshooting, you can explore the internal components of your projector. However, it’s best to seek professional assistance if you need more confidence in handling circuit boards and cables. Trained technicians can diagnose and repair any internal issues that might be causing the burn spot.
Step 8: Avoiding Static Images
Leaving a static image on the screen for extended periods can lead to image retention and burn spots. To prevent this, only pausing on the same image briefly. Make use of screensaver or interactive content to keep the projection dynamic.
Step 9: Trying Pixel-Unsticking Tools
Stuck pixels can create visual anomalies, including burn spots. Fortunately, there are tools designed to address this issue. Pixel-unsticking tools utilize gentle pressure to free stuck pixels, potentially resolving the burn spot problem. These tools work similarly to massaging the stuck pixel back into normal operation.
Step 10: Utilizing Projection Modes
Many projectors offer different projection modes designed for various scenarios. Experiment with these modes to shift the focus away from the burn spot. Adjusting settings, you can find a mode that minimizes the visibility of the burn spot, redirecting attention to the rest of the screen.
Step 11: Using Color Filters
Creativity can come to the rescue when dealing with burn spots. Attach a color filter that matches the hue of the burn spot. This technique camouflages the spot, making it less noticeable against the filtered background.
Step 12: Considering Screen Placement

The positioning of your projection screen matters. Avoid placing it in direct sunlight or facing intense light sources. Glare and excessive light can exacerbate burn spots. Opt for a location with controlled lighting conditions to reduce the chances of burn spots appearing.
Step 13: Regular Maintenance Routine
Prevention is key. Establish a regular maintenance routine for your projector. Clean the lens periodically using a microfiber cloth. Check for dust accumulation within the casing and ensure proper ventilation. A well-maintained projector is less likely to develop burn spots.
Dive into this Reddit thread for practical advice and solutions on fixing burn spots on projectors. Learn from real experiences and helpful tips shared by the community!
Causes of Burn Spots on Projectors
The solution has been provided above, but I believe you should also know the causes. That’s why I’ve discussed multiple causes here. Several underlying factors can contribute to the appearance of burn spots. Let’s delve into each reason:
1. Dust and Debris on the Lens
A common cause of burn spots is the presence of dust, dirt, or smudges on the projector’s lens. These particles interfere with the light path, leading to distortions in the projected image.
When light encounters these particles, it can scatter and create bright spots on the display. Regular lens cleaning with a soft microfiber cloth can significantly reduce the likelihood of dust-related burn spots.
2. Stuck Pixels
Stuck pixels are individual pixels on the projector’s imaging device (such as DLP or LCD) that remain fixed, displaying a particular color or brightness. Stuck pixels can result from manufacturing defects or prolonged display of static images.
These pixels can emit more light than their surroundings, leading to burn spots. Pixel-unsticking tools or software techniques can help revive stuck pixels and alleviate the issue.
3. Lens Aberrations and Imperfections
The projector’s lens, while meticulously designed, can still have minor imperfections or aberrations that affect light transmission.
These imperfections can cause irregular light distribution, resulting in localized bright areas – burn spots – on the projection surface. Such lens-related burn spots might be more challenging to address as they stem from the lens’s optical properties.
4. Heat and Overheating
Projectors generate heat during operation, and excessive heat can impact various components, including the imaging device and the lens.
Prolonged exposure to high temperatures can cause uneven aging of these components, leading to irregularities in light output.
These irregularities can manifest as burn spots on the display. Ensuring proper cooling and ventilation for the projector can help mitigate heat-related issues.
5. Image Retention and Persistence
When a static image remains on the screen for an extended period, certain pixels can experience image retention or persistence. This is particularly common with projectors in environments that consistently display the same image or logo.
Over time, the retained image can create a noticeable burn spot on the screen. Preventing prolonged display of static images can help prevent this issue.
6. Age and Wear of the Light Source (Bulb)
The projector’s light source, often a bulb, has a finite lifespan. As the bulb ages, its brightness and color output can become uneven. This unevenness can lead to variations in light intensity, potentially causing bright spots – burn spots – on the display. Replacing the aging bulb with a new one can rectify this issue and restore uniform brightness.
7. Optical Path Obstructions
Any obstruction along the optical path, such as foreign particles or internal components casting shadows, can cause irregularities in the projected image. These obstructions can redirect or scatter light, resulting in localized bright spots.
Inspecting the projector’s internal components for any anomalies and ensuring they are debris-free can help address this issue.
I have provided this Quora link just for your ease so that you can find insights on fixing burn spots on projectors in this Quora discussion.
FAQs
Q1: Can I use any cleaning solution on the lens?
A: Stick to a microfiber cloth, but if you must use a solution, go for a lens-specific cleaning kit.
Q2: How often should I replace the bulb?
A: It depends on usage, but a good rule is to replace it after 2,000 to 3,000 hours of use.
Q3: Is it safe to open my projector for cleaning?
A: If you’re not experienced, it’s best to leave internal cleaning to professionals to avoid accidental damage.
Conclusion
Projector burn spots can arise from various factors, ranging from dust and debris on the lens to more complex issues like optical imperfections and aging components. Identifying the specific cause is essential for implementing the appropriate solution. Regular maintenance, proper cooling, and avoiding extended static images can go a long way in preventing and addressing burn spots, ensuring your projector consistently delivers clear and high-quality projections.
REFERENCES
- https://www.reddit.com/r/projectors/comments/hjhpjx/i_have_a_dark_spot_in_my_projector_and_idk_how_to/
- https://www.hometheaterforum.com/community/threads/screenburn-on-a-projector.43205/
- http://www.bigscreenforums.com/forum_topic.cfm?which=245
- https://www.ifixit.com/Answers/View/548221/Brown+smudge-spot+on+the+projection+image+about+1-6th+of+total+picture
- https://www.quora.com/What-is-screen-burn-in-and-how-do-you-fix-it

Fernando Shrader
Hey, It’s me, Fernando Shrader. I’m the creator of this website. You might wonder why I’ve created this blog and what’s the difference between Visual Finds and other online blogs. As a professional technician working for the last 8 years with projectors, I though this is the right time to share what I’ve learned in this journey with an online audience so they can see what I’m doing and how they can solve their problems! Happy Learning!