
The best way to mount your gadget without endangering a rental property is with an L-shaped hook stand. You don’t need to drill holes in your ceiling or wall because the L-Shaped stand comes with hooks.
A projector mount can substantially improve your home theater experience or increase the impact of presentations. However, not everyone can drill holes in their walls or ceiling. The good news is that other projector mounting options don’t require drilling. Although you’re eager to install your new projector, are you apprehensive about making holes in your walls or ceiling?
Be at ease! We’ll look at a few non-drilling projector mounting techniques in this article so you may watch a movie in the comfort of your own home. Whether you’re a tech-savvy enthusiast or a casual movie buff, we have you covered with these straightforward, non-invasive fixes.
1. Using an L-Shaped Stand with Hooks
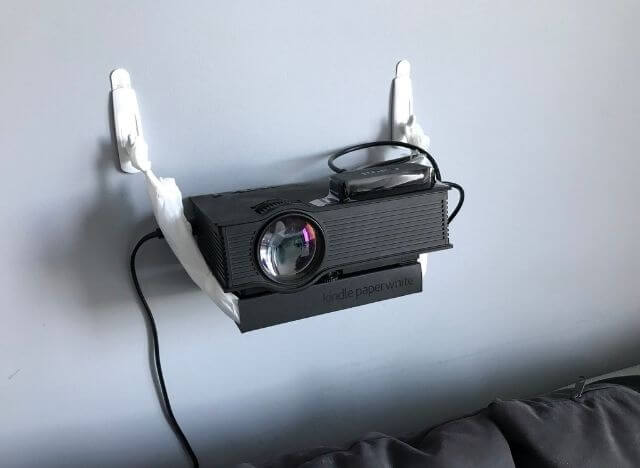
We’ll start by looking at a technique that uses an L-shaped stand with hooks. For projectors with mounting holes on the bottom, this method works well. Here is how to go about it:
Measure and Position
Please ensure the L-shaped stand is stable before setting it down on a flat surface. Mark the spots on the frame corresponding to the distance between the mounting holes on the projector.
Attach Hooks
Consider the projector’s weight while selecting solid hooks to hold the load. Securely fasten the hooks to the stand’s indicated locations.
Hang the Projector
Aligning the mounting holes with the hooks on the L-shaped stand, carefully set the projector on it. Make sure it fits snugly to avoid any swaying when used.
Adjust and Test
To get the ideal projection angle, tilt or rotate the projector as necessary. By projecting an image onto the screen, you may check the setup and make necessary adjustments.
2. Using Suction Cup Mounts
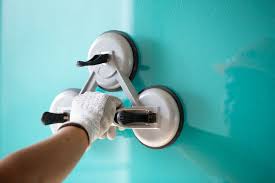
Let’s explore the second technique for how to mount a projector without drilling – using suction cup mounts. Suction cup mounts offer a short-term but reliable option for projector mounting. This technique works well on flat, smooth surfaces like glass or tiles. To use suction cup mounts, follow these steps:
Clean the Surface
Clean the place where you plan to attach the suction cup mounts completely. Make sure the surface is clean and smooth because any dust or debris can obstruct the suction.
Attach the Suction Cups
By applying pressure, the suction cups are firmly adhered to the cleaned surface.
Mount the Projector
The majority of suction cup mounts have movable arms or brackets. To firmly attach the projector to the suction cups, line up the mounting holes on the projector with the brackets.
Stability Check
By gently shaking the projector, you can check the stability of the configuration. You’re OK to go if it stays put.
Let’s take a look at the Reddit link I provided, where you can find valuable ideas on setting up your projector without drilling. By exploring the discussions and experiences shared by others, you can get helpful insights and tips for your own setup.
3. Using Strong Adhesive

If you choose a temporary mounting solution, adhesive solid pads or tapes can save the day. But keep in mind that they might not be appropriate for long-term use. Take these actions:
Select the Adhesive
Choose robust adhesive tapes or pads that can hold a lot of weight.
Clean and Prep
Clean the bottom of the projector and the area where the adhesive will be applied. Make sure both are dust-free and dry.
Attach the Adhesive
The adhesive pads’ protective covering should be peeled off and firmly pressed into the mounting holes of the projector.
Mount the Projector
Place the projector carefully against the wall or ceiling, lining the sticky pads with the intended mounting locations. To guarantee a solid binding, apply pressure for a short period.
Temporary Solution
Remember that sticky mounts can lose their adherence over time because they are not indestructible. Periodically inspect the mounting and add reinforcement when necessary.
If you’re looking for even more in-depth ideas on how to set up your projector without drilling, I highly recommend checking out this informative YouTube video. Click on the link below to access the video:
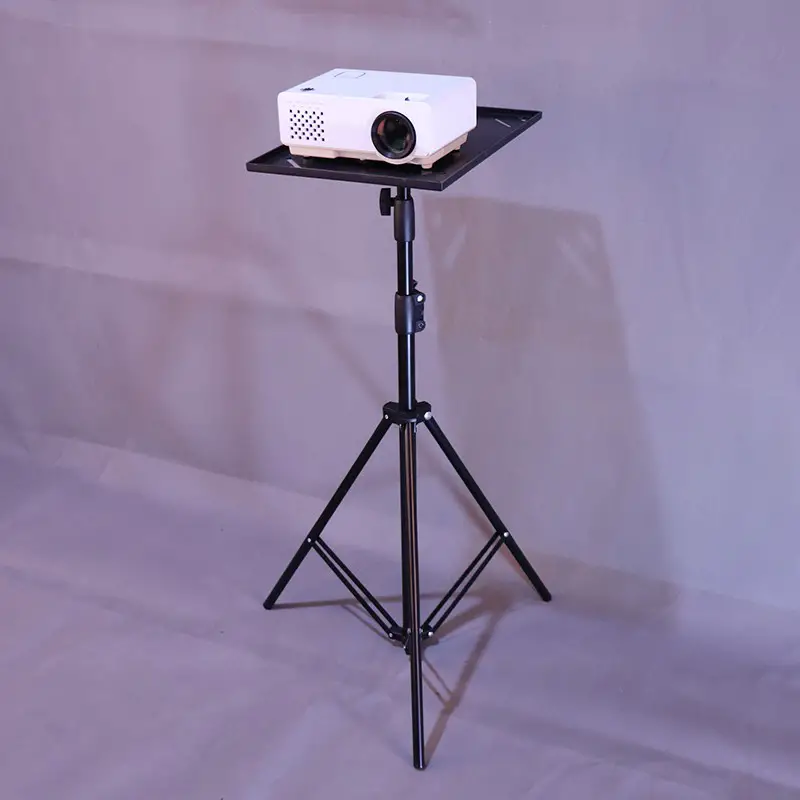
4. Using Projector Stands
The projector supports a flexible and dependable mounting option for your projector without the need for drilling. They offer a stable base for your device and are adjustable. How to use them is as follows:
Select the Right Stand
Select a projector stand appropriate for your projector’s weight and dimensions. For the most versatility, look for stands that can be adjusted for height and angle.
Position the Stand
Make sure the stand is stable and level before positioning it in the appropriate spot.
Mount the Projector
The majority of projector stands include a universal mounting bracket or plate. Your projector can be mounted to the stand by attaching the mounting plate to the base.
Adjust and Fine-Tune
Adjust the stand’s height and angle to acquire the ideal projection alignment. To hold the projector in its place, tighten any knobs or locks.
Test and Enjoy
By projecting a picture, you may check the setup and make any necessary adjustments. Enjoy your favorite films on the large screen while you sit back and unwind!
Below I provided another Youtube video, where you’ll gain valuable insights and practical tips to make your projector installation a breeze. Enjoying a top-notch home theater experience.
5. Using a Table as a Mount
When all else fails, mounting a projector on a table is a quick and straightforward workaround. Here is how to go about it:
Sturdy Table Selection
Select a strong table that is stable and able to support the weight and size of your projector.
Positioning the Projector
The projector should be positioned on a table appropriately from the wall or screen. Ensure that the center of the screen is in line with the projection angle.
Anti-Slip Padding

Consider placing anti-slip padding between the projector’s base and the table’s surface to stop the projector from moving or vibrating.
Cable Management
To keep the setup tidy and prevent trip risks, neatly arrange the cords.
Keystone Correction
Specific models provide keystone correction to address the visual distortion brought on by angling the projector. If you require a square and aligned projection, use this feature.
Below, I have compiled a comprehensive list of frequently asked questions (FAQs) related to mounting projectors without drilling. Take a look to clarify any doubts you might have:
Frequently Asked Questions
Q1: Can I use adhesive mounts for a long-term projector setup?
Yes, interim projector mounting can be accomplished with adhesive mounts. However, they might not be the best for long-term use because their stickiness could deteriorate with time, particularly with heavier projectors. For extended use, think about more durable options like projector supports.
Q2: What if I have a sloped ceiling? Can I still use a projector stand?
Yes, you can use a projector stand with a sloped ceiling. Look for stands with adjustable legs or feet to accommodate uneven surfaces. Some stands also offer tilt adjustments, allowing you to project onto a screen even with a slanted ceiling.
Q3: Are suction cup mounts suitable for all surfaces?
Suction cup mounts work best on smooth, non-porous surfaces like glass or tiles. They might adhere less effectively to textured or rough surfaces. Always test the suction cups’ grip before mounting your projector to ensure stability.
Q4: Can I use an L-shaped stand for a ceiling-mounted projector?
An L-shaped stand with hooks is more suitable for floor or tabletop projectors. For ceiling-mounted projectors, consider using a ceiling mount or a dedicated projector stand designed for overhead setups.
Q5: What is keystone correction, and do all projectors have this feature?
Keystone correction is a feature that allows you to adjust the image distortion caused by projecting at an angle, especially when the projector is not perfectly aligned with the screen. Not all projectors have this feature, so check your projector’s specifications or settings to see if it’s available.
Conclusion
A practical and non-intrusive approach to take in your favorite films, sporting events or presentations is mounting a projector without drilling. In this article, we’ve looked at five different methods, each with advantages.
You can now turn any space into a small theater using an L-shaped stand, suction cup mounts, strong glue, a projector stand, or a straightforward table arrangement. Remember to consider the stability of your selected method, the weight and size of your projector, and any adjustments required for flawless projection.
REFERENCES
- https://www.avsforum.com/threads/hanging-projector-screen-without-drilling-holes.3105588/
- https://www.reddit.com/r/projector/comments/1544dpl/how_to_mount_a_projector_without_drilling_easy/
- https://www.instructables.com/Mount-Projector-Without-Drilling-With-IKEA-LACK-Sh/
- https://rankprojectors.com/how-to-mount-a-projector-without-drilling/

Fernando Shrader
Hey, It’s me, Fernando Shrader. I’m the creator of this website. You might wonder why I’ve created this blog and what’s the difference between Visual Finds and other online blogs. As a professional technician working for the last 8 years with projectors, I though this is the right time to share what I’ve learned in this journey with an online audience so they can see what I’m doing and how they can solve their problems! Happy Learning!