
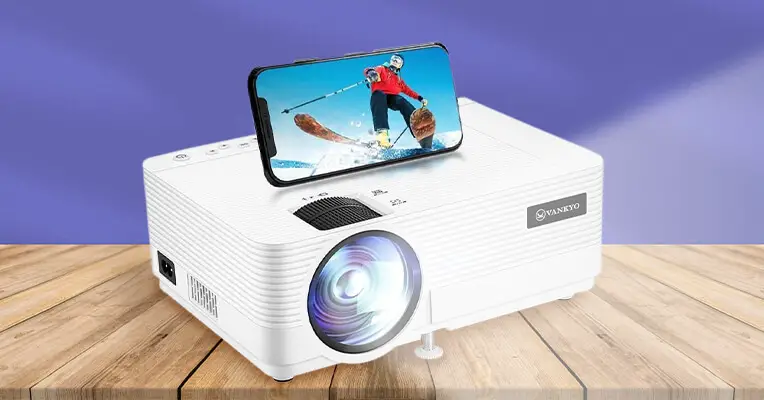
Experiencing a black screen while attempting screen mirroring on your Vankyo projector can be frustrating. This issue can arise from various factors, from connectivity to device compatibility problems.
Experiencing black screen issues during Vankyo projector screen mirroring can be caused by various factors, such as display toggle problems, loose cables, or incorrect input sources.
In this article, we’ll delve into the common causes of the Vankyo projector screen mirroring black screen dilemma and provide insightful solutions to help you troubleshoot and resolve this issue. Whether you’re encountering a display toggle problem, loose cables, or cases with input sources, we’ve got you covered with practical steps to identify and rectify the issue.

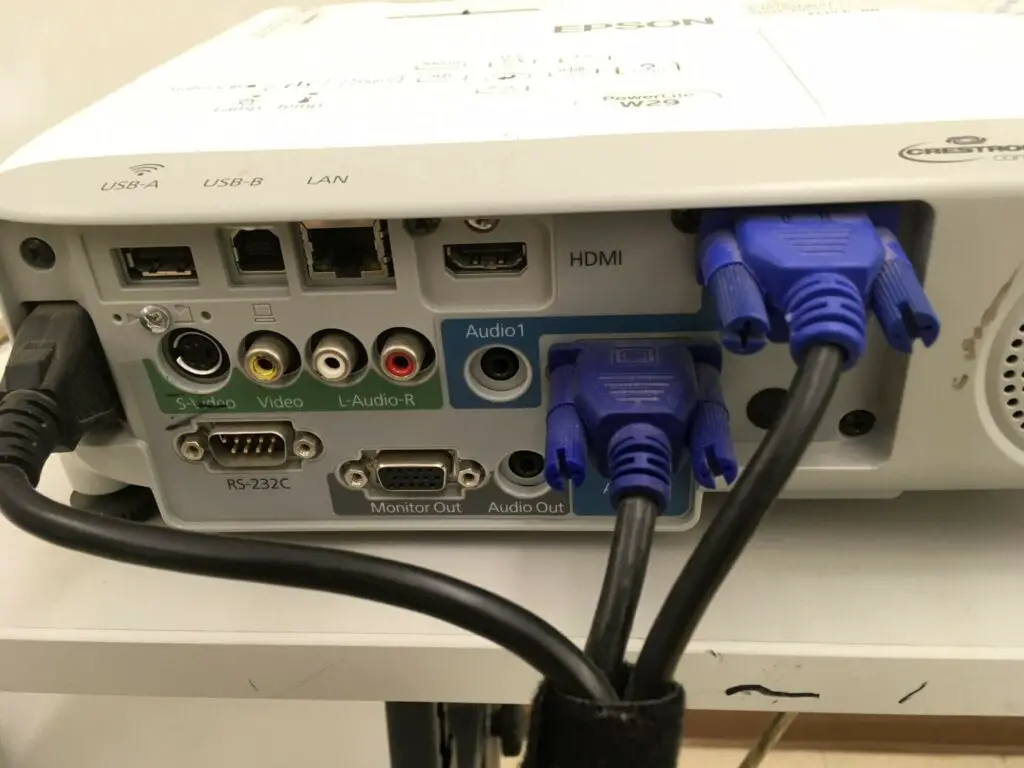
1. Connectivity Issues (Wi-Fi, Bluetooth, HDMI)
Connectivity issues can lead to a black screen, often stemming from problems with Wi-Fi, Bluetooth, or HDMI connections. Unstable connections or loose cables may disrupt the signal.
How to identify
Identifying connectivity issues involves observing symptoms like intermittent black screens, error messages indicating signal problems, or visual artifacts during playback.
Solution
Wi-Fi/Bluetooth Issues:
- Ensure a steady and high-speed internet connection.
- Use tools to assess Wi-Fi signal strength and quality.
- Reboot the router and reconnect devices.
Reconnect/Reset:
- Reconnect the projector to the Wi-Fi or Bluetooth network.
- Reset network settings on both the projector and connected device.
- Check for conflicting devices causing interference.
Cable Inspection:
- Inspect HDMI cables for any physical damage.
- Replace damaged cables with high-quality alternatives.
- Use shorter HDMI cables to minimize signal degradation.
Alternate HDMI Ports:
- Test different HDMI ports on both the projector and the device.
- Ensure the selected HDMI port is functional.
- Clean HDMI ports of dust or debris.
2. Incompatibility Between Devices
Incompatibility between devices can result in a black screen. Devices need to support the same protocols for seamless connectivity.
How to identify
Identification involves recognizing error messages indicating device incompatibility, failed connection attempts, or unexpected behavior during interaction.
Solution
Compatibility Check:
- Refer to device manuals to verify compatibility.
- Check online forums for any reported compatibility issues.
- Contact customer support for both devices for assistance.
Firmware Update:
- Update the firmware on both the projector and the connected device.
- Manufacturers often release updates to enhance compatibility.
- Follow the firmware update instructions carefully.
Driver Installation:
- Ensure the necessary drivers are installed on the connected device.
- Check for driver updates and install if available.
- Reinstall drivers if issues persist.
I’m providing you with a YouTube video; maybe you’re not connecting correctly. You can watch this complete method to see if it helps.
3. Projector Input Source
Incorrect projector input source settings may lead to a black screen, especially when the projector cannot receive signals from the connected device.
How to identify
Identifying this issue involves checking for error messages indicating the wrong input source or no signal. Visual cues, such as the incorrect input displayed, are also indicators.
Solution
On-Screen Menu Access:
- Use the projector’s remote control to access the on-screen menu.
- Navigate to the input/source settings.
Cycle Through Inputs:
- Cycle through available input sources until the correct one is found.
- Check the connected device for the correct output.
Connected Device Activation:
- Ensure the connected device is powered on and transmitted.
- Activate the connected device before turning on the projector.
- Try a different input source if issues persist.
Auto Source Detection:
- Enable auto-source detection if available.
- This allows the projector to switch to the active input automatically.
4. Power Switched On

The projector’s lack of power is a simple yet crucial cause of a black screen. This can happen due to power supply issues or a malfunctioning power switch.
How to identify
Identification involves checking for the absence of power indicators, no fan noise when the projector should be active, or any other signs of lack of power.
Solution
Power Source Verification:
- Confirm that the projector is plugged into a functional power source.
- Check for any damage to the power cables.
Power Switch Inspection:
- Ensure the power switch is in the ON position.
- Toggle the power switch a couple of times to eliminate any potential misalignment.
Battery Check (If Applicable):
- If using battery-powered projectors, check battery levels.
- Replace or recharge batteries if needed.
5. Software or Firmware Issues
Outdated or corrupted software/firmware can result in a black screen. This can occur after updates or due to other software-related glitches.
How to identify
Identification involves observing error messages post-update during startup or abnormal behavior, suggesting potential software or firmware issues.
Solution
Firmware/Software Update:
- Visit the manufacturer’s official website for firmware/software updates.
- Follow the provided instructions for updating.
- Ensure compatibility with the connected device.
Rollback to Stable Version:
- If issues persist, consider rolling back to a stable firmware version.
- This involves downloading and installing the previous version.
- Only perform a rollback if supported by the manufacturer.
Factory Reset (If Necessary):
- As a last resort, consider a factory reset.
- This will revert the projector to its original settings.
- Ensure to back up any critical settings or configurations.
6. Settings Misconfigurations
Incorrect projector or connected device settings can lead to a black screen. Misconfigurations may occur during adjustments or due to user error.
How to identify
Identification involves checking for recent changes in settings, error messages related to incompatible configurations, or unexpected behavior due to incorrect settings.
Solution
Restore Default Settings:
- Access the projector and device settings menus.
- Restore all settings to their default configurations.
- Reconfigure settings based on recommended values.
Double-Check Resolution:
- Ensure the resolution settings on the projector match the connected device.
- Adjust resolution settings on the connected device if necessary.
- Avoid setting resolutions beyond the projector’s capabilities.
Display Quality Settings:
- Adjust brightness, contrast, and other display quality settings.
- Use default or recommended settings for optimal performance.
- Check for color temperature or saturation adjustments.
7. Display Toggle
Accidental toggling of the display mode can result in a black screen. This may happen due to unintentional button presses or key combinations.
How to identify
Identification involves recognizing sudden blackouts or display changes after pressing specific buttons, indicating potential issues with display toggling.
Solution
Toggle Display Correctly:
- Identify the correct button or combination for toggling display modes.
- Press the button to cycle through available modes.
- Refer to the device manual for specific instructions.
Check Device Settings:
- Access the device settings to verify display configurations.
- Ensure the correct display mode is selected.
- Disable automatic display mode switching if it causes issues.
Physical Inspection:
- Inspect the remote control for any stuck or malfunctioning buttons.
- Ensure there’s no external interference affecting display toggling.
- Replace the remote control batteries.
8. Cables Loose
Loose cables, including power and video cables, can cause intermittent black screens. This can happen due to movement or physical disturbances.
How to identify
Identification involves observing blackouts or display errors that coincide with movements or adjustments, indicating potential issues with loose cables.
Solution
Secure Cable Connections:
- Inspect all cables for snug connections, replacing damaged ones.
- Consider cable management solutions to prevent future issues.
- Ensure all cables are securely connected to their respective ports.
9. Projector On Standby Mode
If the projector is in standby mode, it may not display anything. This is a common oversight and can lead to unnecessary concerns.
How to identify
Identification involves recognizing visual cues, such as a blinking power light without full activation, indicating that the projector is in standby mode.
Solution
Deactivate Standby Mode:
- Press the power button on the projector or remote control.
- Check for any indicators on the projector confirming standby mode.
- If using a remote control, replace batteries if needed.
Power Source Stability:
- Ensure a stable power source and functioning power cables.
- Plug the projector into a different power outlet for testing.
- Avoid using power strips or surge protectors if possible.
Check Remote Control:
- Inspect the remote control for any damage or stuck buttons.
- Replace the remote control batteries.
- Test the projector with manual power button activation.
10. Projector Cover Loose
A loose projector cover can interrupt the display. This is a mechanical issue that may go unnoticed but can have a significant impact on the visual output.
How to identify
Identification involves visually inspecting the projector for any visible gaps or unsecured covers, indicating a potential issue.
Solution
Secure Projector Cover:
- Close the projector cover securely.
- Inspect the cover latch for any damage.
- Avoid obstructing ventilation areas with the cover.
Operational Check:
- Activate the projector and observe for any abnormal sounds.
- Ensure the cover remains securely closed during operation.
- If the issue persists, contact customer support for further assistance.
FAQs
Q: How do I address ‘No Signal’ problems on my Vankyo projector screen?
A: Evaluate the problem source, test with different devices, check cables, and verify results to troubleshoot ‘No Signal’ issues.
Q: How can I resolve issues where my Vankyo projector fails to play video?
A: Check the projector setup, ensure the correct source connection, troubleshoot video output signal problems, and verify the resolution settings.
Q: My Vankyo 3W projector screen mirroring is not working. What could be the problem?
A: Check the wired converter or HDMI cable for issues, as these components might be causing problems with screen mirroring on the Vankyo 3W projector.
Conclusion
Addressing Vankyo projector screen issues requires a multifaceted approach. Solutions, such as adjusting display settings, checking cables, and ensuring proper device compatibility, play a crucial role in resolving common problems encountered during screen mirroring or HDMI connectivity.
REFERENCES
- https://discussions.apple.com/thread/253223225
- https://ivankyo.com/blogs/tech/failure-videos-display-projector-screen-mirroring
- https://ivankyo.com/blogs/tech/how-to-setup-screen-mirroring-with-a-vankyo-projector

Fernando Shrader
Hey, It’s me, Fernando Shrader. I’m the creator of this website. You might wonder why I’ve created this blog and what’s the difference between Visual Finds and other online blogs. As a professional technician working for the last 8 years with projectors, I though this is the right time to share what I’ve learned in this journey with an online audience so they can see what I’m doing and how they can solve their problems! Happy Learning!